
Do you find it hard to put my writing rules into practice? Struggling with commas, spelling or finding the right words? Let me share seven tips and tools to help you with your writing. I’ll talk about style guides, accessibility, grammar and more. This blog follows last week’s blog about my writing rules for learning materials. If you haven’t read it, you might want to do so now. Otherwise, let’s get started.
1. Use a writing style guide
Most larger organisations have a writing style guide. It’ll provide instructions on the organisation’s preferred writing style and language. You’ll also get guidance on the use of capitals, terminology, how to write numbers, specific punctuation requirements, etc. It’s a useful start when you’re new to an organisation. Remember that you’re writing learning materials and might want to challenge the organisation’s preferred formal writing style!
Check out the Atlassian website for an example of a writing style guide. It includes a section about inclusive language: https://atlassian.design/content
2. Check the brand style guide
When you start structuring your text, check out the brand style guide first. You’ll find the preferred fonts, font sizes for body text and headings, colours, the use of white space, etc. Brand style guides also often include the do’s and don’ts regarding the style and use of visuals. This will be helpful when you’re writing workbooks or slide decks.
The brand style guide from Alienware is a nice example: https://issuu.com/design.st.ch/docs/alienware_brand_guide_2016_pages
3. Use a thesaurus
Sometimes you’ll be looking for a synonym or an alternative word to prevent too much repetition of the same word. A thesaurus helps you to find similar words. Nowadays, Microsoft Word (Ms Word) has a thesaurus function. You’ll find it under the Review button. Just type in the word you’d like to replace and get suggestions to choose from. Here is an example.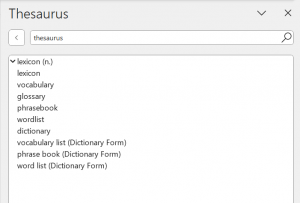
4. Do a spelling and grammar check
Your first step is to choose a spelling and grammar checker. Ms Word has a built-in spelling and grammar checker. I prefer to use software like Grammarly on top of that. Grammarly checks the spelling and grammar, and provides useful suggestions to rewrite sentences. There’s a free and paid version of Grammarly.
Then, ensure you use the correct language setting in your spelling checker. For example, English (Australia) and not English (United States) to prevent a range of incorrect spelling suggestions.
5. Perform an accessibility check
In last week’s blog about writing rules, I gave you several tips that’ll improve your writing and increase accessibility. I mentioned short sentences, general readability and structuring your text. You can use apps like Readable or the Editor in Ms Word to check the readability. In the Editor, you need to select Insights to get the readability statistics.

Ms Words also offers an accessibility checker. It’ll give you feedback and suggestions on how to improve. For example, to change the text colour if there’s not enough contrast.
For more tips, check out the accessibility guidelines on the W3C website: https://www.w3.org/WAI/tips/writing/
6. Listen to your text
If you listen to what you’ve written, you’ll quickly hear where the problems are. So, making this part of your text review is a good habit. One option is to read your text out loud. For me, it works better to use the text-to-speech function in Ms Word. It’s called Read Aloud under Review or use CTRL + ALT + space.7. Get an extra pair of eyes
Once you’ve gone through a rigid review yourself, ask someone else to read your work. A fresh pair of eyes will iron out the final kinks. Before you ask someone to review, determine the goal. Will their focus be on your writing or also on the content? This will help you choose the best person to review your text. And yes, it can be a bit daunting to let someone else read and comment on your text after you’ve spent so much time writing it.Over to you
I hope these tips and tools will help you to deliver better learning materials. I tried to stick with the free tools. You can pick and choose whatever tool suits your needs and budget. There are many more apps to help you with improving your writing skills. But more important: enjoy writing!